Motorcycle theft is an unfortunate reality that riders must contend with. To protect your prized possession and have peace of mind, fitting a wired tracker to your motorbike can be a wise investment. A wired tracker offers advanced tracking capabilities, enabling you to locate your bike in the event of theft or unauthorized use. Here is a step-by-step guide on how to install a wired tracker on your motorbike to enhance its security.
Step 1: Choose the Right Tracker Before you begin the installation process, select a wired tracker that meets your requirements. Consider factors such as tracking accuracy, battery life, and additional features like geofencing or remote immobilization. Ensure compatibility with your motorcycle’s electrical system and verify that the tracker is suitable for outdoor use.
Step 2: Gather the Necessary Tools To install the wired tracker, gather the tools you will need. These may include a socket set, wire cutters, electrical tape, crimping tool, zip ties, and a multimeter for testing electrical connections.
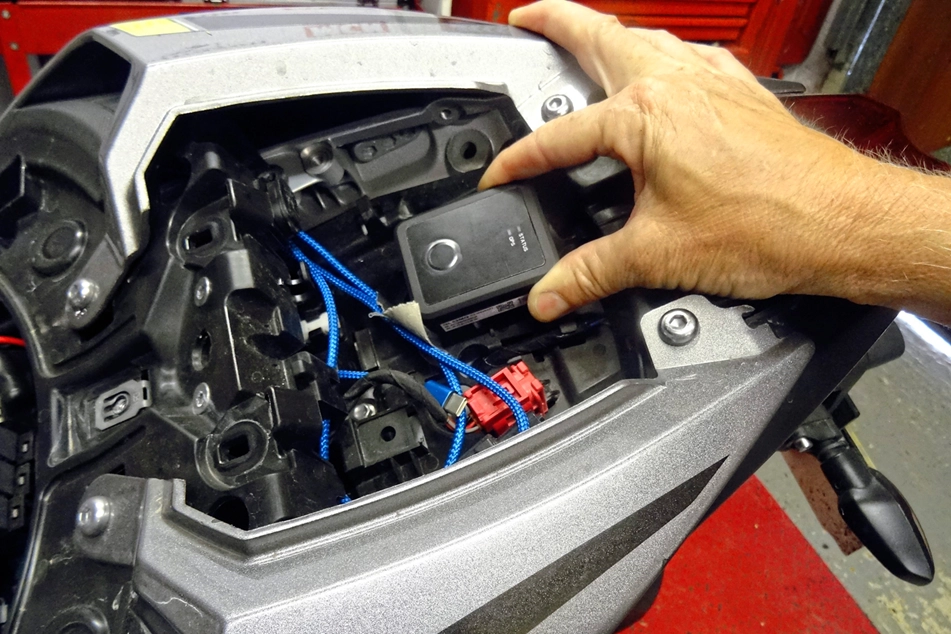
Step 3: Identify a Suitable Location Locate a suitable spot on your motorcycle to install the tracker. It should be discreet yet easily accessible for future maintenance. Consider areas with sufficient space to accommodate the tracker and its wiring without interfering with other components or compromising the bike’s aesthetics.
Step 4: Disconnect the Battery For safety purposes, disconnect the motorcycle’s battery to prevent any electrical mishaps during the installation process. This step is crucial to avoid damaging the electrical system and ensuring a smooth installation.
Step 5: Mount the Tracker Securely mount the tracker using the provided brackets, adhesive pads, or zip ties. Ensure a stable attachment to prevent vibrations or accidental dislodging while riding. Follow the manufacturer’s instructions regarding the positioning and orientation of the tracker for optimal functionality.
Step 6: Wire Connections Identify the appropriate electrical wires for connecting the tracker. These wires usually include power (positive and negative), ignition, and ground connections. Consult your motorcycle’s wiring diagram or seek professional assistance if necessary. Use wire cutters and a crimping tool to make secure connections, and insulate them with electrical tape to protect against moisture and short circuits.
Step 7: Test the Connections Before finalizing the installation, use a multimeter to test the connections and ensure they are working properly. Check for proper voltage and continuity to verify that the tracker is receiving power and that the connections are solid.
Step 8: Reconnect the Battery Once you have confirmed that the connections are correct and secure, reattach the motorcycle’s battery and double-check that all connections are tight and properly insulated.
Step 9: Activate and Test the Tracker Follow the manufacturer’s instructions to activate the tracker and set up any necessary online accounts or mobile apps. Test the tracker’s functionality to ensure it accurately reports the location and responds to commands, such as remote tracking or immobilization.
Step 10: Conceal Wiring (Optional) If desired, conceal the wiring to enhance the tracker’s stealth and protect it from tampering. Secure the wires along existing cable harnesses or frame members using zip ties or adhesive clips. Take care not to compromise the integrity of the wiring or hinder access for future maintenance.
By following these steps, you can successfully install a wired tracker on your motorbike, bolstering its security and increasing the chances of recovering it in the event of theft. However, if you are uncertain about any aspect of the installation process, it is advisable to consult a professional or seek assistance from an experienced motorcycle technician. Remember, a wired tracker is an invaluable tool in deterring theft and safeguarding your motorcycle, providing you with added peace of mind as you embark on your two-wheeled adventures.
In conclusion, fitting a wired tracker to your motorbike is a proactive step towards enhancing its security and protecting it from theft. By carefully following the installation process outlined in this guide, you can equip your motorcycle with an advanced tracking system that offers peace of mind and the ability to locate your bike in the unfortunate event of unauthorized use or theft.
Remember, the effectiveness of a wired tracker depends on proper installation, secure connections, and regular maintenance. Be sure to periodically check the tracker’s functionality, update any necessary software, and maintain the integrity of the wiring to ensure optimal performance.
While a wired tracker significantly increases the chances of recovering your motorbike, it is also important to supplement it with other security measures such as high-quality locks, secure parking, and vigilance in public spaces. By combining these efforts, you can create layers of protection that make your motorcycle less attractive to potential thieves.
Ultimately, investing in a wired tracker demonstrates your commitment to safeguarding your motorbike and preserving your passion for riding. Stay one step ahead of criminals and enjoy the open road with the added confidence that your motorcycle is protected by cutting-edge technology and your own proactive measures.
Ride on, knowing that you have taken important steps to secure your prized possession and preserve the joy of motorcycling for years to come.